
Following on from the photo canvas prints I made over the weekend here is a new project working with transposing images. In this tutorial we'll use what we learned in working with printed images and gel medium and incorporate it into a simple sewing project. Not a sewer? No problem, just buy a plain cushion cover in a light colour, take the insert out, and pick up this tutorial when we get to Step 3.
Cost: Under $5
Time: 1 - 2 hours
Materials:
50cm of plain calico fabric (around $1.50)
1 printed image from an inkjet printer or toner photocopier
Matte gel medium from an art store
Trims such as decorative braiding, ribbon, or lace to suit your design (optional)
Here we go...
1. Print out your image. Before you print it, have a play with colours and effects on photo websites such as www.photobucket.com if you want something a bit different.
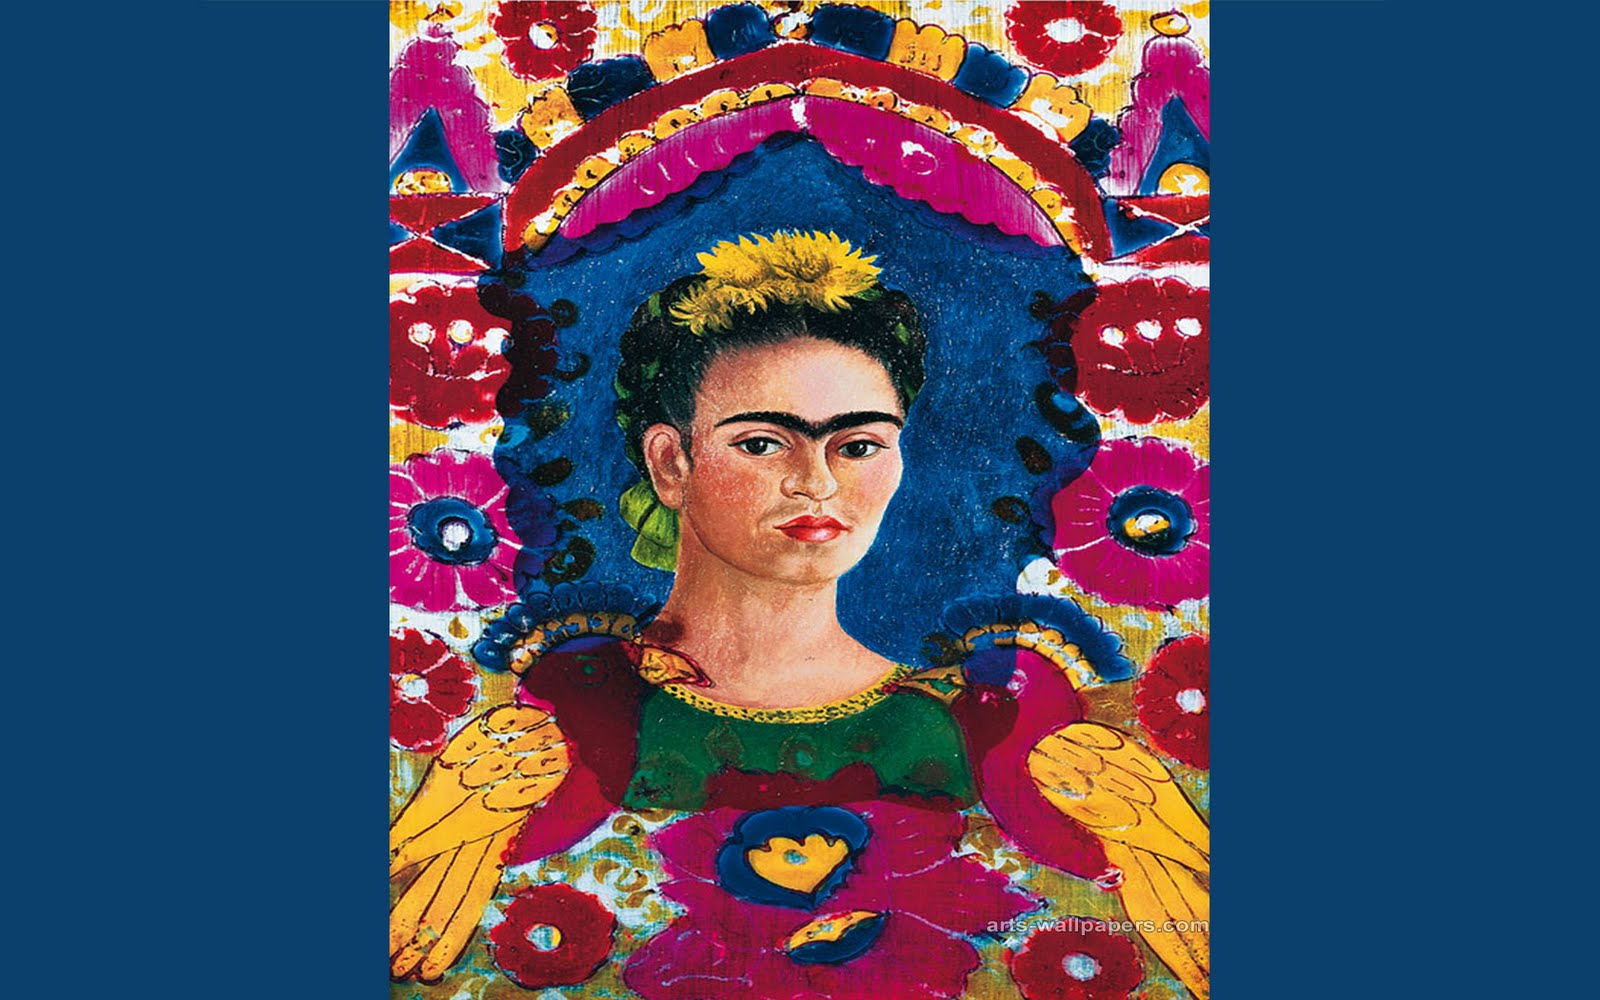
This was my image. I'm Frida Kahlo's biggest fan. I cropped it into a square (eliminating the blue border) and resized it to fit my cushion panel.
2. Cut out the squares for your cushion out of the calico fabric. Mine was 35cm x 35cm.
3. Trim your printed image then decide where you want it to be placed on the calico. Mark with pencil in the corners so you know where to place it.
4. Brush the marked area with gel medium in a thick, even layer then place your image face down.

5. Smooth out the wrinkles from the centre outwards using a credit card or roller. Be careful not to rip the paper. Smooth out any remaining bumps with your finger. If a few wrinkles remain don't worry, it'll still look great.
6. Leave to dry completely. I hung mine of the line on a sunny day and it was dry in 2 hours.
7. Spray with water and gently peel off the paper, keep rubbing until all the paper is gone.

8. When your image is clean and dry add any decorative trims. I hand sewed my ribbon on using a large darning needle. The print was quite thick and stiff so it may not go through your sewing machine.

9. With right sides together sew around the edges leaving a gap to turn the cushion the right way out. If you prefer a removable cover you can add a zip instead.

10. Stuff the cushion or put the insert inside and sew up the opening. Lovely.

Hindsight
The print was a lot more durable on fabric than it was on canvas so I could give it a good scrape to get the paper residue off. I found that a laminated library card worked the best.
Ribbon or lace around the edge of your print will hide any untidiness left from the gel medium.
You can use any fabric to make the cushion or pillow but make sure it's durable and preferably a natural fibre (not stretch).
How about trying...
- A personalised cushion for your child featuring a picture of them or their favourite pet
- A vintage flower print on top of cottage floral fabric
- Using a vintage magazine or advertisement as your print - photocopy it and use the copy
- Using a print out as a stencil then colouring it in with fabric pens or paints
No comments:
Post a Comment
Thanks for your comments, I love to hear from you!